Firebase : Functions
Table of Contents

Firebase is a very complete service offered by Google that allows a large number of things:
- Authentication
- Database
- Storage
- Hosting
- Functions
- ML Kit
- Crashlytics
- Performance
- Test Lab
- …
And many other things!
The part we are interested in today is the cloud function.
As you probably know, cloud functions are simple pieces of code executed on demand. They are generally serveless and can therefore be executed anywhere and at any time without being repeated in a specific context.
Therefore we will need triggers that will allow us to trigger the execution of a function. There are very simple triggers such as an HTTP call or database update.
But firebase also offers other types of triggers that can be used such as :
- Cloud Firestore Triggers
- Realtime Database Triggers
- Remote Config Triggers
- Google Analytics for Firebase Triggers
- Crashlytics Triggers
- Cloud Storage Triggers
- Cloud Pub/Sub Triggers
- HTTP Triggers
So we can imagine a whole bunch of scenarios like sending an email / an automatic notification to a user when he sends us a crashlytics report due to a bug in our application, it increases the quality of our application and the user experience but it costs us almost nothing as a developer.
As a mobile developer and iot I often need an API for my applications. The most common case is user administration for a website. We want to be able to:
- list users
- creates a new user
- disable a user
- activate a user
It should be noted that cloud functions run NodeJS, so we can use any library we want to create our API. Express being my favorite is what we’re going to use now.
First of all we need to create our Firebase Function project. To do this, place yourself in a blank folder and execute the following command:
If you do not have to install the firebase tools, execute this command:
firebase init
You should see the following choices in front of you:
npm install -g firebase-tools
You should see the following choices in front of you:
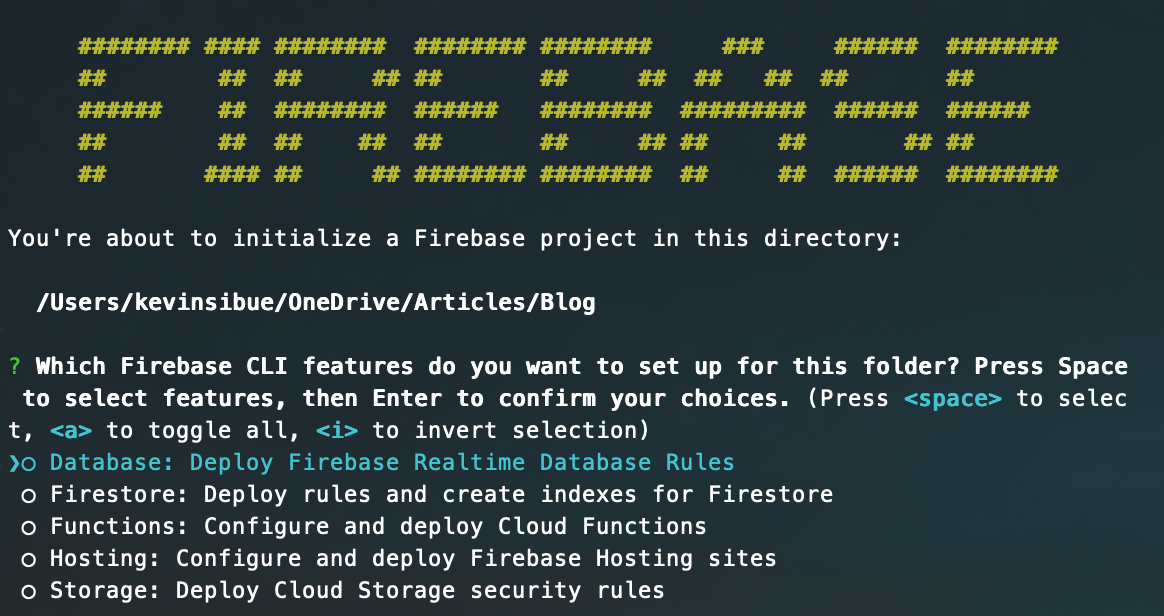
Then select your project.
The firebase tools will now create a complete cloud function project ready to be deployed for you. An index.js file will be created. This is the file that will be executed on the firebase platform. You can create other files but they must always be used in the index.js file.
Like any NodeJS project, we will have a package.json file containing all our dependencies and a node_modules folder that will contain all the downloaded dependencies. So don’t forget to execute the command to install the packets:
npm i
Let’s start by installing express and setting up the exit of a first road:
npm i express --save
Let’s put the following code in the index.js file :
const functions = require('firebase-functions');
const admin = require('firebase-admin');
const express = require('express');
const app = express();

admin.initializeApp();
The libraries “firebase-functions” and “firebase-admin” will be necessary for the proper functioning of our API.
Let’s create the first endpoint to test our function:
app.get('/test', (req, res) => {
    res.status(200).send('It works!')
});
Nothing complicated, just sent us back text from the moment we call the route /test.
We no longer have any cases left where our express app is linked to an endpoint cloud function. To do this, simply enter this code:
exports.admin = functions.https.onRequest(app);
admin is the name of our cloud function.
To test in real conditions, we will have to deploy our cloud function. To do this, we just need to execute the following command:
firebase deploy
You should now see this in the Dashboard tab:
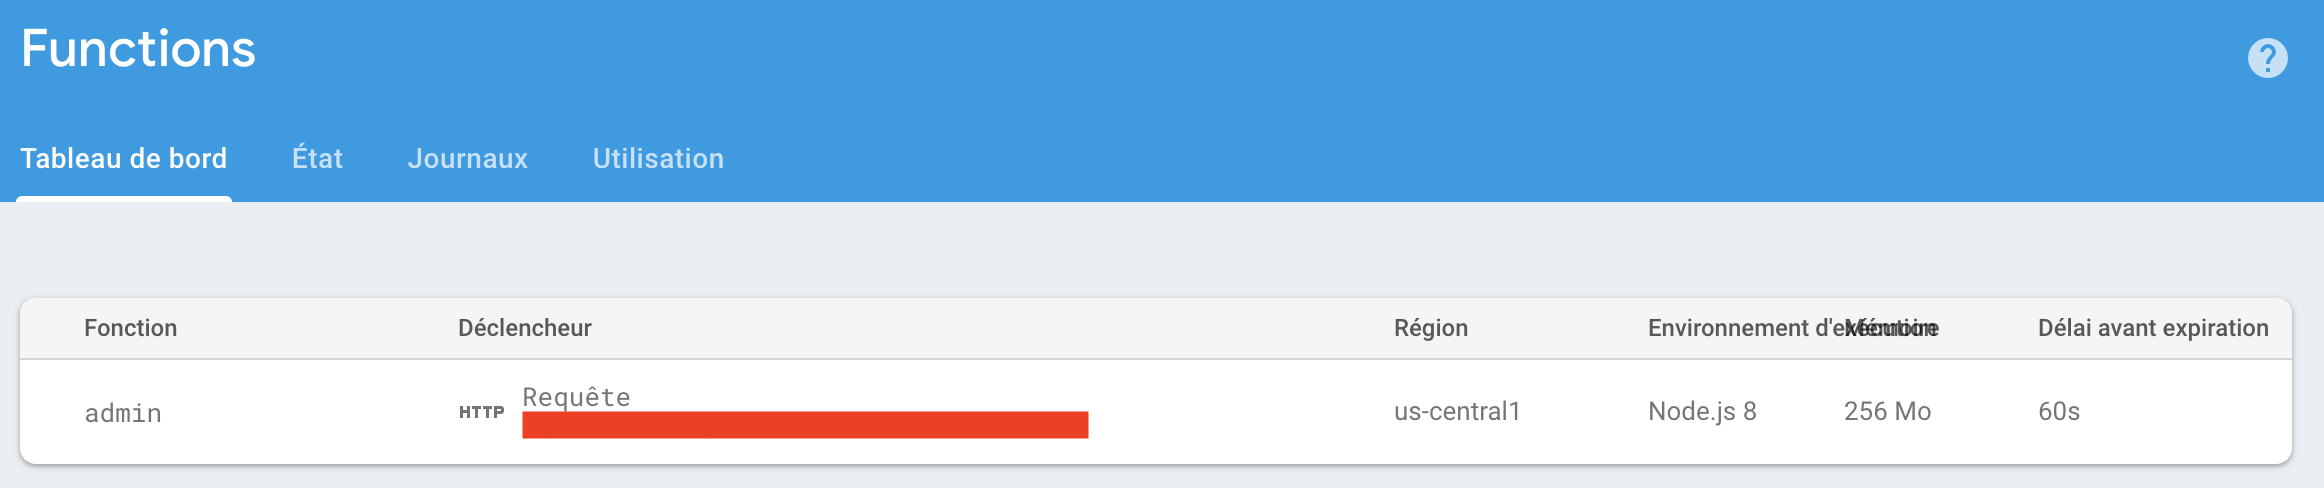
In this picture, the part in red is the address where you can call your cloud function. Don’t forget to add /test in our case for this to work.
Use software such as postman to make our request and test. Everything should work perfectly. If not, go to the “Logs” tab of the firebase to better understand what happened.
User API #
As we said earlier, we want to list users, enable/disable them and be able to create new ones.
Let’s start by creating a new user:
As required by the convention, for a creation we use the POST method.
app.post('/createAdmin', async (req, res) => {
    try
    {
        const userInDto = dto.createUserInDto(req);
        await admin.auth().createUser({
            email: userInDto.email,
            emailVerified: false,
            password: userInDto.password,
            displayName: userInDto.username,
            disabled: false
        });
        res.status(201).send('');
    } catch (ex) {
        console.log('error', ex);
        res.status(400).send(
            dto.createErrorOutDto(
                100,
                'Something goes wrong!'
            )
        );
    }
});
In order to be a little cleaner, I created a dto.js file that contains some very useful methods to convert incoming data to model and vice versa.
function createUserInDto(req) {
    if (req.method !== 'POST') {
        console.log('request method is not POST', req);
        throw new Error('Not POST methods');
    }
    const val = req.body;
    if (!('username' in val) ||
        !('password' in val) ||
        !('email' in val)) {
        console.log('some data isnt ok', val);
        throw new Error('Malformed JSON Body');
    }
    return {
        username: val.username,
        password: val.password,
        email: val.email
    }
}

function createErrorOutDto(code, ex) {
    return {
        errorCode: code,
        errorMessage: ex
    }
}

function createFirebaseUserOutDto(json) {
    return {
        id: json.uid,
        email: json.email,
        username: json.displayName !== undefined ? json.displayName : '',
        disabled: json.disabled,
    }
}

module.exports = {
    createUserInDto: createUserInDto,
    createErrorOutDto: createErrorOutDto,
    createFirebaseUserOutDto: createFirebaseUserOutDto
}
As you can see nothing complicated here, we retrieve the data from the request and use the createUser method of the firebase-admin library to create a new user.
As for the activation or deactivation, nothing more complicated:
app.put('/user/enable/:id', async (req, res) => {
    changeUser(req, res, true);
});

app.put('/user/disable/:id', async (req, res) => {
    changeUser(req, res, false);
});

async function changeUser(req, res, enable) {
    try
    {
        const userId = req.params.id;
        if (userId === undefined || userId === null) {
            throw new Error('userId is not set');
        }
        await admin.auth().updateUser(userId, {
            disabled: !enable
        });
        res.status(200).send('');
    } catch (ex) {
        res.status(400).send(
            dto.createErrorOutDto(
                100,
                'Something goes wrong!'
            )
        );
    }
}
All we have to do now is list all the users of the database.
app.get('/users', async (req, res) => {
    try {
        const users = await admin.auth().listUsers();
        let result = [];
        users.users.forEach((userRecord) => {
            const newUser = dto.createFirebaseUserOutDto(userRecord.toJSON());
            result.push(newUser);
        });
        res.status(200).send(result);
    } catch (ex) {
        res.status(400).send(
            dto.createErrorOutDto(
                100,
                'Something goes wrong!'
            )
        );
    }
});
Securing the API #
We were able to make all the requests we wanted and quite easily. Now it is a question of securing our API in order to prevent anyone from calling it directly without our permission. To do this we will simply add an API key.
For that we will add a verification middleware. It will have to be placed before our requests if we want it to take effect:
const apiKeyMiddleware = (req, res, next) => {
    const apiKeyHeader = req.headers.apikey;
    if (apiKeyHeader === config.apiKey) {
        next();
        return;
    } else {
        res.status(401).send('');
    }
};
Replace the config.apiKey by the key you want to use.Then call the middleware:
app.use(apiKeyMiddleware);
You no longer have to call the API with our key in the headers. And here is your API for firebase users is ready.